Showing posts with label Cake. Show all posts

Monday, October 31, 2011

Easy Coffee Cake


I may have mentioned this before but in case I haven’t, here it is…. I enjoy and prefer baking from scratch. I think it has a lot to do with the fact that when I was a child, even though my mom was a good cook, she usually baked with mixes…cake, brownie and even used a box mix for her pie crust. I rarely had a baked good that was made from scratch. I’ll get more into that subject in a future post. Even though I prefer baking from scratch, I am not completely against using shortcuts from time to time, especially when I come across recipes that use mixes as an ingredient and that look and taste good, not to mention are so easy to prepare. I have a few of those kinds of recipes that I’ve already posted about and here is one more.

I can’t remember when or where I found this recipe, but it’s another one that I used to make often and then eventually, after a while, I guess got bored with so stopped. It was very popular at work and it was easy enough to make that I could even prepare it in the morning, put it in one of those Pyrex carriers and it would be nice and warm by the time I and my co-workers arrived at the office. Because it’s so easy to make, It’s a great recipe to make on Christmas morning…..a nice warm coffee cake to have with a cup of coffee, tea or glass of milk….yum!
Easy Coffee Cake
Print Recipe

1 cake mix (spice, caramel or yellow)
1 cup chopped nuts
1/2 cup sugar
1 tsp cinnamon
1/2 cup butter (1 stick), melted

1. Prepare cake mix according to package directions. Pour into a 9x13 inch cake pan. After 15 minutes in the oven at the temperature stated on box, remove cake and sprinkle on a mixture of the chopped nuts, sugar and cinnamon. Then pour melted butter over all. Continue baking until done, 15 to 20 minutes.

2. Serve warm

3. May be frozen

Notes:
I've made this using a yellow cake mix and a spice cake mix, which are both good, but I prefer the caramel. The problem with using the caramel mix is that it isn't easy to find, the only place I'm able to locate it is at Meijer.


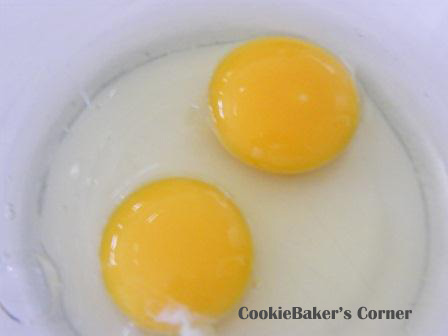
One cake mix, whatever ingredients that are needed to prepare the cake mix (the Duncan Hines caramel mix uses, water, oil and eggs), nuts, sugar, cinnamon and butter. When I first started making this, the Duncan Hines Caramel mix was easy to find....not so easy now. As I stated in the recipe notes, I'm only able to find it at Meijer.


Prepare mix, according to package directions and pour into a 9x13 pan that has been coated with butter/oil and flour. I use either Baker's Secret or Pam for baking. Love the ease of just spraying it on in the pan.


Place in preheated oven (temperature that is listed in the cake mix directions) bake for 15 minutes and remove.


Combine nuts, sugar and cinnamon. I usually do this while the cake is baking.


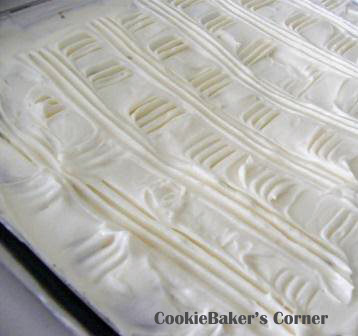
Sprinkle mixture on cake.


Pour melted butter over cake.


Return cake to oven and bake and additional 15-20 minutes or until cake is done.


Hmmm, looks like someone was doing a little tasting while I had my back turned.


This was as good as I remembered. It smelled so good…the aroma of the caramel cake and cinnamon was wonderful. Apparently it was too much for Michael to stand since, as you can see from the previous photo, he tasted it as soon as it came out of the oven.

Sunday, October 16, 2011

Apple Walnut Cake


Fall is my favorite time of year.  I love the temperatures of early to mid-fall, sometimes the days are warm and other days are cool and crisp, well suited for wearing a sweatshirt, sweater or light weight jacket. The colors are gorgeous….the leaves on the trees begin to turn red, yellow, gold and orange and the mums and some bushes add to the beauty of the season. I like the feel and even the way the air smells and after the long hot days of summer, that make me feel limp and lethargic, I feel energetic and reborn in the fall.

One of my most favorite things about autumn is the produce that is in season, especially apples. I know you can get apples all year round, but in my opinion, the best apples are the ones that are only available in the fall….Jonathan, Winesap, Honeycrisp, Cortland, etc. They are so good and are great to just grab and eat or even better, to use in baking.
One day while out running errands, Michael and I stopped by a local farm stand where they had a nice selection of apples so I purchased some Jonathan, Cortland and Honeycrisp. I thought about using some to make a pie but since I had just made a cherry pie, decided to make a cake instead. As I was going through some of my recipes, I came across one that I hadn’t made in years. It’s a delicious cake and when I first discovered the recipe, I used to make it often but as newer recipes made their way into my files; this one was pushed aside and forgotten.
I’m a long time subscriber to Taste of Home magazine….I’ve been getting it since it was first published back in the 90’s and have all, except the first magazine, in my collection. This recipe happens to come from the second magazine that Taste of Home published.
Apple Walnut Cake
1 2/3 cups sugar
2 eggs
1/2 cup vegetable oil
2 tsp vanilla extract
2 cups flour
2 tsp baking soda
1 1/2 tsp ground cinnamon
1 tsp salt
1/2 tsp ground nutmeg
4 cups chopped, unpeeled apples (4 or 5 apples)
1 cup chopped walnuts
Frosting
1/2 cup of butter (1 stick), room temperature
8 oz of Philly cream cheese (1 package), room temperature
2-3 cups powdered sugar
1 tsp of vanilla extract

1. In a mixing bowl, beat sugar and eggs.
2. Add oil and vanilla; mix well.
3. Combine flour, baking soda, cinnamon, salt, and nutmeg; gradually add to sugar mixture, mixing well.
4. Stir in apples and walnuts.
5. Pour into a greased and floured 9x13 inch pan.
6. Bake in a 350 degree oven for 50-55 minutes or until cake testes done.
7. Let cool.
Frosting
1. With an electric mixer, mix the butter and cream cheese together, about 3 minutes on medium speed until very smooth. Scrape down the sides and bottom of the bowl to ensure even mixing.
2. Add the vanilla extract and mix. Slowly add the powdered sugar. Keep adding until you get to desired sweetness and thickness.
3. Frost cooled cake


Mix sugar and eggs. You can use an electric mixer, but I find that mixing with a whisk works just fine.


Add oil and vanilla; mix well.


Pre ground nutmeg doesn’t stay fresh very long, so I buy the whole nutmeg and using a hand grater (rasp), grate it myself. Not only is the nutmeg fresher but it smells heavenly.


Vietnamese cinnamon is my favorite…has a stronger flavor. As many of you know, I’m a big Penzey’s fan so buy most of my herbs and spices from them; never fear, you don’t have to purchase this cinnamon online, you can find Vietnamese cinnamon at the supermarket.


Clockwise from top: cinnamon, salt, nutmeg and baking soda.


Add to flour and mix with a whisk.


Gradually add flour to sugar mixture.

I apologize for my lack of pictures at this point. As I mentioned earlier, it’s been a long time since I’ve made this cake so, as I was combining the flour with the sugar mixture, the batter became quite thick, more like a cookie dough than a batter. I was getting concerned, thinking I had left something out of the recipe so stopped to read the list of ingredients. When I saw that I hadn’t made a mistake, I proceeded where I left off and forgot to photograph the batter before adding the apples and walnuts. So, if your batter looks like cookie dough, don’t worry, it’s supposed to look that way. Trust me; it will work out just fine.


Chopped apples. Chop the apples in smaller pieces if you want but I like them this size. Don't worry about the peels, that concerned me the first time I made this. After the cake is baked, you won't even know they are there. I love that I didn't have to peel the apples, that's my least favorite thing about baking with them, just be sure to wash them well before chopping.


Chopped walnuts.


Combine batter, apples and walnuts.


Pour into greased and floured pan. The batter is so thick, you have to spread the batter, it doesn't really pour.

Bake for 50-55 minutes or until cake tests done. Allow cake to cool before frosting.

I had just put the cake on a cooling rack and was ready to walk away when I turned back around and noticed Michael, with spoon in hand, ready to dig into the cake. I said, “Don’t touch it, don’t you dare touch that cake. I still have to frost and photograph it.” The look on his sad face was priceless. I stood there until I saw him walk away before I left the kitchen. 

 Combine 8 oz. cream cheese and 1/2 cup butter.

This cake had a cream cheese frosting recipe but it called for 2 3 oz. packages of cream cheese. I don’t know about you, but I usually have cream cheese on hand but it’s the 8 oz. packages, not the 3 oz. So I used a recipe that called for 8 oz. of cream cheese.


 Mix in vanilla and powdered sugar.


 Ready to frost the cooled cake.


The cake tasted as good as I remember. The apples release their juice while baking making this a moist and tasty cake. Reminds me a lot of carrot cake, only made with apples.

Michael was very happy….he grabbed his trusty spoon as soon as I finished snapping photos.

Wednesday, May 25, 2011

Angel Food Cake

 
I have to admit that I love rich, decadent, gooey desserts filled with caramel, chocolate and other ingredients that make them almost sinful. Every now and then I like to go a little simpler and that’s when I go to plain vanilla or chocolate ice cream, pound cake and angel food cake.

Lately I’ve been making a lot of potato soup, trying to perfect my mom’s recipe, and since her recipe calls for rivels, I’ve been using a lot of egg yolks which means I now have acquired a large supply of egg whites. In the past I would have just tossed the egg whites knowing that I would probably never use them, but lately I’ve been trying to be more thrifty and less wasteful so have been freezing the egg whites. I hadn’t thought much about what I would do with the abundance of egg whites that was quickly taking up valuable freezer space until one day when I started craving angel food cake.
I don’t believe I’ve ever eaten homemade angel food cake, when I go out to eat and if I have room, I go with one of those yummy rich desserts, I know I’ve never made one however, I did use a box mix to make one at least once or twice. I don’t remember my mom ever making one either, she didn’t do a whole of baking from scratch by the time I came around, although she must have years before because I have her tube pan. She and I usually just bought our angel food cakes from the supermarket, which really aren’t too bad. So I began my search for a recipe. I pulled out my old, old Betty Crocker cookbook, I always turn to the old faithful’s (Betty Crocker, Fannie Farmer or Joy of Cooking) at times like this and they rarely fail to provide me with instructions on basic cooking and baking. I began and ended my search with Betty Crocker; I not only found one but two recipes, not to mention several sponge cake recipes as well.
Angel Food Cake Deluxe
Printer Friendly Version

1 cup cake flour
1 1/2 cups confectioner's sugar
12 egg whites, (1 1/2 cups)
1 1/2 teapoons cream of tartar
1/4 teaspoon salt
1 cup granulated sugar
1 1/2 teaspoon vanilla
1/2 teaspoons almond extract

1. Heat oven to 375 degrees. Stir together flour and first amount of sugar; set aside.

2. In large mixer bowl, beat egg whites, cream of tartar and salt until foamy. Add second amount of sugar, 2 tablespoons at a time, beating on high speed until meringue holds stiff peaks. Gently fold in flavorings. Sprinkle flour-sugar mixture 1/4 cup at a time over meringue, folding in gently just util flour-sugar mixture disappears. Push batter into an ungreased tube pan 10x4 inches. Gently cut through batter.

3. Bake 30 to 35 minutes or until top springs back when touched lightly with finger. Invert tube pan on funnel, let hang until cake is completely cool.

Oven Temperature: 375°F

Source: Betty Crocker's Cookbook
Copyright: 1969 Twenty-first  Printing 1974

I've had this cookbook for a long time, it's probably the first or second one I owned. My mother gave it to me when I was in high school or a year or two after I graduated so it would have been sometime in the mid to late 70's. The funny thing is, at that time I wasn't much into cooking so rarely used it but Mom did, she used it mostly for her apple and cherry pies. I hadn't looked at this book in several years and when I decided to make an angel food cake, pulled this one off of the bookcase to find a recipe. I got carried away by just looking through it....most of the recipes are recipes that require actual cooking with a few that require some type of pre-packaged addition. No microwave instructions at all, unlike so many of the newer cookbooks.
One cup cake flour.
1 and 1/2 cups confectioners sugar
Stir together the flour and confectioners sugar.
Twelve egg whites.
Egg whites, cream of tartar and salt.
I know it isn't easy to see this, but the egg whites, cream of tartar and salt were beat until foamy.

Add the granulated sugar, 2 tablespoons at a time and beat meringue on high speed until it forms stiff peaks. I know, I forgot to take a picture of the sugar being added because I'm just forgetful that way. I'm sure you can picture it yourself.

Isnt' this pretty? I think it is....I love how satiny, smooth and creamy it looks.

If you have a stand mixture, I highly recommend that you use that at this time. I used a good hand mixer and it took a long time for the mixture to form stiff peaks, I’m sure my stand mixer would have accomplished this much quicker.
I use "pure" vanilla and almond extracts....I just like them more than imitation.


Gently fold in flavorings and flour mixture. I’m not sure I can explain how to fold but I’ll try. I use a rubber spatula and gently cut into the middle of the meringue, go to the bottom of the bowl swiping the bottom and side as you pull up. I do this while turning the bowl each time…you don’t want to stir because that will cause the meringue to deflate. You want to keep as much air in the meringue as you can. I saw an America’s test kitchen that showed them using a balloon whisk to do this. You can search the internet and YouTube for instructions and videos that show this procedure. I’m constantly amazed at all cooking videos on YouTube.

This was my mom's tube/angel food cake pan. There are tube pans that come in one piece but I like this one because it is two pieces, it makes removing the cake much easier.

Still working gently, scrape the batter out of the mixing bowl and push into an ungreased tube pan. Take a knife and cut through the batter. I think I can explain this process a little better than folding, then again, maybe not. Insert the knife blade about halfway into the batter and drag the blade through the batter while turning the tube pan.
Bake 30 to 35 minutes or until top springs back when touched lightly with finger.


Invert tube pan on funnel, let hang until cake is completely cool. If you don't have a funnel, you can use a glass bottle. Another thing I like about this tube pan is that it has these little legs on it eliminating the need to use a funnel.

Pay no attention to the reflection of that woman in the pan. Try as I might, I couldn't keep my image out of there so I guess you're stuck with it. If I had known this would have happend, I would have dressed better and done something with my hair.....scary, I know.
Once the cake has cooled, run a knife or metal spatuala around the rim of the pan (between the cake and the pan) and remove the cake. The third and final thing I like about this pan is that it makes it very easy to remove the cake. Once I run my spatual around the rim of the pan, I remove that and then run the spatula along the bottom (between the pan bottom and the cake) to loosen and remove.


Success....my very first Angel Food cake! I like to serve this with fruit or eat it just by itself. Today I took a bag of frozen strawberries, mashed them up a little and added some sugar...yum!
Related Posts with Thumbnails