Showing posts with label Vegetables. Show all posts

Wednesday, September 28, 2011

Vegetable Beef Soup


I was sitting at home one day last week when I received an email from my sister Jean, asking me if I would like to get together over the weekend to make vegetable soup. Since I didn’t have any plans, it was the first weekend of Fall and the weather was a little cool and dreary and felt  like soup weather, I agreed to help her make soup.

On Friday Jean called and asked if I wanted to go to Kroger with her to shop for the ingredients. I knew, since we double the recipe (I take some home, she keeps some and gives some to her son and daughter and their families and her adult grandchildren who are now out on their own), it would involve buying and carrying a lot of canned goods, I agreed to help. I drove to her house, picked her up and headed in to town for our shopping but our first stop was at a local Italian restaurant for lunch. We went on to Kroger and after spending 45 minutes to an hour we had our cart loaded with fresh vegetables, canned vegetables, beef broth, beef and cat food. There is no need for concern, the cat food wasn’t used in our soup; it was for her cat and the strays that she has adopted. We loaded the groceries in my car and were soon headed back to her house. The hardest part was yet to come, unloading my car and carrying in all those heavy bags.
Saturday was soup day. I drove to her house where she already had two 12 quart stock pots on the stove with the beef, beef broth and spices simmering. We soon got to work peeling, chopping and slicing the fresh vegetables and then adding all the ingredients to the stock pots. Soon the house started to smell wonderful and not long after that, the soup was ready.
This recipe was originated by my mother. As with most of her recipes, since she cooked according to taste,  mom didn’t have a recipe for her vegetable soup. I remember on soup day, Mom would start out with one pot of soup and by the time she got it to taste the way she wanted, she usually ended up with four large pots of soup simmering on the stove. Fortunately, she had plenty of family and friends to share with. Jean had helped Mom make the soup many times so she knew the ingredients that Mom used and tweaked it a little by adding the bouquet garnet (Mom was a plain cook and seasoned with salt, pepper and plenty of fat), which made it even better, then a few years ago Jean and I worked together to get measurements for the ingredients - we wanted to avoid what I call, Mom’s growing pot of soup.
Vegetable Beef Soup
Print Recipe

1 1/4 pounds (approx.) beef shank center cut or soup bone (cut in half)
2 lbs beef shoulder roast, (2 to 3)
2 cans beef broth, (48 oz.)
1 bay leaf
10 pepper corns
1/4 tsp marjoram
6 cups crushed tomatoes (2-1 pound cans)
1/2 cup chopped onions (2 small)
2 cups celery, sliced (about 12 small stalks)
4 cups chopped carrots (about 8 large)
1 small head cabbage cut in pieces (about 8-10 cups)
6 potatoes large dice, (6 to 8)
1 can cut green beans, (28 ounce)
1 can white cream style corn, (15 ounce)
1 can yellow cream style corn or 1 (11 ounce) can whole kernel sweet corn, (15 ounce)
1 15 ounce sweet peas
1 can baby limas, (15 ounce)
1 can kidney beans (optional), (15 ounce)
2 Tbs instant beef bouillon, (or to taste)

1. Wrap bay leaf, pepper corns and marjoram in cheese cloth. In large stock pot, boil beef, broth and spices for about 2 hours.
2. Remove beef and discard spices. Strain broth and return to stock pot. Allow beef to cool. Once cool, cut into bite size pieces, removing and discarding fat. Put beef back in pot. Add crushed tomatoes, onion, celery, carrots and cabbage to beef broth - cook until tender.
3. Add potatoes, and remaining ingredients and cook until potatoes are done.
4. Once all ingredients are combined and the soup has cooked a little, taste the soup and add, salt, bullion or more beef broth if desired.
I arrived at my sister's house after she had already started on the soup. This contains the beef broth, beef and bay leaf, pepper corn and marjoram. This is one of the two 12 quart stock pots that we were making.

After about two hours, the beef was removed, allowed to cool and then cut into bite sized pieces or shredded.

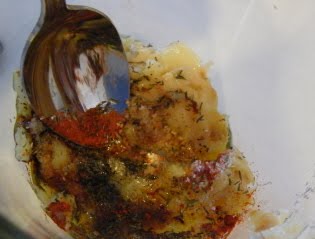
Onions, carrots and celery.
We added  the carrots, onion and celery to the pot and let that simmer while we prepared the cabbage.


I have to tell you that I'm not a cabbage fan. I do like cole slaw but that's the only way I'll eat it, except in this soup....it really adds a lot of flavor. So please try it at least the first time you make this, by the time the soup is finished the cabbage is soft and almost translucent.

Add the cabbage to the rest of the vegetables in the pot and stir.

Jean happened to look out the window and saw a couple of wild turkeys. I have never seen wild turkeys before so grabbed my camera and went outside to take their pictures. They didn't like getting their pictures taken so started to move. Unlike the deer around here, they don't stick around when humans are around, but I did manage to get a decent picture of them before they ran into the woods.

Now back to making some soup. They should be glad that we wanted vegetable beef soup and not turkey noodle.

Now the really hard part.....the opening of the cans.

The the potatoes chopped into bite sized pieces and

add to the pot along with the can of green beans and crushed tomatoes.


Add the remaining cans of vegetables.

Now we’re beginning to worry, we were running out of room in the stock pot and we still have to add the beef. As you can see the soup is all the way to the rim and the other stock pot was in the same condition. Jean pulled out a 10 quart Dutch oven and began to add soup from both stock pots to it. We were surprised that this had happened since we’ve made this before using the same two stock pots. Later Jean said that, since we couldn't find the right size cans of soup that we needed, she did add a little extra broth.


So we had the same problem my mother always ran into....the growing pot of soup. Although, as long as you have enough large stock pots or Dutch ovens, too much soup is never a problem.


Now we have enough room to add the beef. Allow soup to simmer until the beef is heated through then taste and add more salt and/or bouillon if needed. We added a little more beef broth because the soup was even thicker than we like (and we like it thick) and we also added more bouillon and salt. Then we let it simmer a little longer.


While waiting for the soup to finish cooking we saw more wild turkeys wandering around the edge of the woods. There were about seven this time but by the time I was able to take their picture, two had managed to get away from the group. It's a good thing the only thing I shoot with is a camera. Wonder what wild turkey tastes like?


The soup is finished and we are tired and hungry so my sister, brother-in-law and I sit down to a meal of delicious homemade soup....yum!!!

Now all we have to do is find enough containers to for all that soup.

Wednesday, July 14, 2010

Fresh Green Beans

As a child one of my favorite vegetables was green beans….especially if they were fresh homegrown beans. I remember summers when my mom would prepare fresh green beans….after she rinsed them off; she would bring a large pan of beans into the living room and snap them while watching TV. I would usually help…I always liked to snap them; and still do. It seemed like we rarely had to buy them, we usually knew someone who farmed or had a small garden who was willing to provide us with all we could eat. If, for some reason, we weren’t lucky enough to be on the receiving end of free green beans, we could always find a small vegetable stand while driving through the country. A sad sign of the times….these small family vegetable/fruit stands are practically nonexistent and we now have to limit ourselves to buying lovely homegrown produce to Saturday’s farmer’s markets.

I prepare my green beans pretty much like Mom used to. She would put a big pot on the stove (she was usually cooking for a lot of people) put the green beans in the pot and covered them with water, put in some type of ham/bone, salt and usually added small red potatoes then she would cook them for several hours. While she was working around the house, she would run out to the kitchen to check her beans, making sure the water didn’t boil off and scorch them. She always managed to get to them in time but sometimes she would have a close call. As I said I prepare green beans in almost the same way, the only difference is the quantity (I’m not cooking for a large family) and in how they are cooked….I use a Crockpot. When using a Crockpot, I don’t worry about the beans cooking dry and can let them cook several hours without worry.

This is another recipe that isn’t actually a recipe…..it’s more a list of ingredients.

green beans - I use about 2 pounds, cleaned, ends cut off and bean cut/snapped in half or thirds (depends on the length of the bean)
small red potatoes - I put in several, you want plenty but you want more beans than potatoes.
ham/bone -I buy ham shank/bone, you can usually find them at the supermarket for about $1.00 each and usually come one or two per package
water, enough to cover the beans
salt - I use kosher and add some in the beginning and then when beans have cooked about 4-5 hours, taste and usually have to add more.
onion - chopped - I don't always use onion but this time I did add some at the last minute
Ham Soup Base, 1 heaping teaspoon, optional - the beans are delicious without but this just adds a little extra flavor.
 
Put all of the above ingredients in a Crockpot/slow cooker and cook on high for approximately 5-6 hours. The time will vary...it depends on how firm/soft you like your beans and on your Crockpot. I have several Crockpots and each heats a little differently.

Fresh green beans...cleaned and snapped. I prefer stringless beans.

Ham shank or soup bone - if you can't find this in the section where ham is sold, check with someone at the meat counter.

Small red potatoes - I was lucky enough to find some very small ones at the farmers market. Scrub the potatoes to remove dirt and put them in the Crockpot. If the potatoes are a little large, cut them in  half.

Put everyhing in the Crockpot and cover with water.


I add a heaping teaspoon of Penzey's Ham Soup Base to the water. If you don't have a store near you or don't want to order it, the beans will still be delicious without. The only other product that I've seen like this in some supermarkets (I've seen it at Meijer, Giant Eagle and maybe Kroger) is Better than Boullion...they make a ham base. I've never used that so can't comment on the product.

Cover the Crockpot/slow cooker and cook on high for approximately 5-6 hours.

You may want to leave the house while this is cooking....the aroma could make you faint with hunger, even if you weren't hungry to begin with. These taste so good, it could make you cry!

Thursday, April 22, 2010

Cleo Coyle’s Twilight Cauliflower


 Did I hear you ask…..who in the world is Cleo Coyle? Cleo Coyle is a writer of culinary mysteries. If you aren’t familiar with them, culinary mysteries are really pretty cool. They are mysteries whose main character is in some way, involved with food, caterers, bakers, etc.,......and most of these books also have several recipes included. I’ve been a mystery lover ever since I picked up my first Nancy Drew book at the ripe old age of about nine. I even wanted to be Nancy Drew, sports car and all…..I think a lot of us who were fans wanted to be her. Anyway, I read a lot of culinary mysteries, I get to mix my love of mysteries with my love of food/cooking. It’s amazing how many culinary mysteries are out there and Cleo Coyle’s, Coffeehouse Mysteries series, is one of my favorites. Ms. Coyle’s main character, Clare Cosi, manages a family owned coffeehouse in New York City and blends coffee, food and murder in each book. Cleo Coyle has her own site, Coffeehouse Mystery and also contributes to the Mystery Lover’s Kitchen site. This recipe for Twilight Cauliflower is posted on both.

Now I’m not a cauliflower fan, I think I’ve mentioned that before,…I’ve tried it several ways but have only really been able to choke it down raw and with a lot of veggie dip. One day while reading my favorite blogs, I came across Cleo Coyle’s recipe for Twilight Cauliflower. I was intrigued….I love garlic and know that roasting vegetables gives them a slightly different taste and texture and this recipe did sound good so decided…..why not.

Twilight Cauliflower - Cleo Coyle
20-Clove Roasted Garlic Cauliflower
Print Recipe
1 average head of cauliflower (about 25 florets)
20 whole cloves of garlic (about 2 heads)
4 tablespoons olive oil
1/2 teaspoon water
Salt to taste

Total Cooking times:
Garlic roasting time - 30-35 minutes
Cauliflower roasting time - about 1 hour

Preheat oven to 350 degrees F. In a small baking dish, place 20 whole garlic cloves (with skins removed). Add 4 tablespoons of olive oil and a splash of water (about 1/2 teaspoon). Cover the baking dish tightly with aluminum foil and bake about 30-35 minutes. Note: garlic should be cooked soft enough to easily smash with a fork.

Oil will be bubbling hot when you remove the foil. Allow the dish to cool a bit then use a fork to mash the garlic into the warm oil, making a thick slurry.

When the slurry has cooled enough to handle, place clean, dry cauliflower florets into a large bowl. (Keep the number of florets to around 25 for the best flavor results.) Pour the slurry over the top of the cauliflower and use your hands to coat the slurry over all of the florets.
Turn up the oven to 400 degrees F. Prepare a large baking dish or roasting pan by coating the bottom and sides with olive oil or lining with aluminum foil. (During roasting, pieces of garlic will bake onto your pan or dish, and this step will help with the cleanup.) Now transfer the slurry-coated cauliflower into the pan and pour any remaining slurry over the top.

Using aluminum foil, tightly cover the baking dish or roasting pan. This will create steam within the dish, which will soften and relax this cruciferous vegetable as it cooks.

Bake for 30 minutes and then remove the foil. Stir the florets and continue roasting (uncovered) for another 30-35 minutes, until fork tender and nicely carmelized. Remove from oven and salt to taste. (I added salt and pepper before returning pan to the oven and then didn't salt later.)

I loved the fragrance that wafted through the apartment while the garlic was roasting. When I took the cauliflower out of the oven, it looked wonderful… a nice, caramelized color. Then, I tasted it……delicious! I finally found a way that I can truly eat and enjoy cauliflower.

I served this with grilled beef brats on toasted New England style rolls and Garlic-Herb Mac and Cheese. As Michael and I were putting away leftovers and cleaning up the kitchen, he asked what I had planned for the leftover cauliflower. I said nothing really; just reheat it for another meal. He decided that he would like to just finish it off, now….and that he did. He said it even tasted great cold. Looks like this recipe meets with his approval as well.

Friday, March 19, 2010

Roasted Garlic Mashed Potatoes - from the Pioneer Woman's Blog


Before arriving at Michael's last Thursday, I had already planned, for the most part, the different meals that I wanted to make. On Saturday, while preparing my grocery list, I decided that it might be nice to ask Michael if there was something that he would like to eat....he immediately replied, "meatloaf!" I think is probably his second favorite food....following crab cakes. So I added meatloaf ingredients to my shopping list.

I usually don't make gravy using the meatloaf drippings, I really never have much anyway, so just make plain old mashed potatoes. I love potatoes in any way shape or form but mashed potatoes without gravy or some additional flavor are just a little bit boring. One day while reading the Pioneer Woman's blog, I came across her recipe for Roasted Garlic Mashed Potatoes.....the recipe sounded very good, even though she adds cream cheese to them....wasn't too sure about that, but decided, what the heck why not give them a try. I've never made any of Ree Drummonds recipes, even though I read her blog regularly and Michael gave me her book, "The Pioneer Woman Cooks," for Christmas....her recipes all look good and none of them look difficult....that's always a plus.

Before heading out to one of our favorite local restaurants for lunch and then the library, I roasted four heads of garlic and left them on the counter to cool while we were gone. When we got home, I prepared the meatloaf and potatoes.  I followed her recipe and then added a head of garlic and tasted....still needed more garlic so added another head.....I ended up adding all four heads to the potatoes. These potatoes were delicious! They were nice and creamy and had a wonderful garlic flavor....yummy! This recipe is definitely a keeper.

I'm not even going to bother posting the recipe or step by step pictures. Ree Drummond does a far better job than I could ever do....so I'm just posting the links to her recipes.

Roast Garlic
Roasted Garlic Mashed Potatoes

I hope you try these potatoes and that you enjoy them as much as Michael and I did.

Thursday, March 18, 2010

Herb Garlic Roasted Potatoes


 I know that it’s been awhile since I’ve posted anything on my blog. I was home for a few weeks and don't do a whole lot of cooking while I'm there....I spend most of my time eating out with family and friends. Now that I’ve been back at Micheal’s, we’ve been on the go practically every day and eating out, at least one meal and sometimes two, on those days. We still have takeout containers in the fridge from the meals that I couldn't finish and some leftover pizza. I have only cooked once and that was scrambled eggs for breakfast last Saturday.  I told Michael that we have to stay home today and tomorrow so I can get some cooking done....before the groceries that we bought on Sunday have to be tossed.

I had a can of crab in the fridge that was in need of use before it spoiled so decided to prepare Michael’s favorite food…crab cakes. I usually serve fried potatoes with the crab cakes but was beginning to feel that I had done those to death and wanted something different. I had noticed an interesting looking recipe in the Winter 2010 edition of the Penzeys Spice catalog and had been planning on making that for several weeks but never seemed to be able to get around to it. Today I had the time and inclination to make the above mentioned potatoes.

Herb Garlic Roasted Potatoes
Print Recipe

2 heads of garlic
5-6 tablespoons olive oil, divided
1 teaspoon salt
1/4 teaspoon ground pepper
1/2 teaspoon thyme, crushed
1/4 teaspoon sweet paprika
6 large Idaho baking potatoes

Preheat oven to 350 degrees F. Slice the tops of the garlic off, and brush with 2 tablespoons of the olive oil. Wrap in foil and bake for 45-60 minutes or until browned and fragrant. Let cool slightly. Push out the garlic cloves into a bowl. Add 1 tablespoon olive oil , salt, pepper, thyme and paprika. Mash with the back of a spoon until it resembles a thick paste. Add a bit more oil if it is too stiff.

Turn the oven up to 425 degrees F. Slice each potato into 3 or 4 thick slices. Spread generous amounts of the garlic paste between each slice and put the potatoes back together. Press them so they stick together. Put each potato on a piece of foil and drizzle with 1-2 teaspoons of oil. Sprinkle with a bit more salt and pepper to taste on top. Wrap tightly. Bake on a cookie sheet at 425 degrees F for 1 hour. Check to see that the potatoes are soft and have a caramelized crust on the bottom. If not, put them back in the oven for 10 to 15 minutes more. It really depends on how large the potatoes are. Serve whole smaller potatoes or several slices of larger potatoes to everyone. This recipe can be doubled or halved easily depending on how many people you have at your table.

Serves 6-10

Note:  Garlic mash can be made the day before and store it in the fridge. Take it out and let it come to room temperature  before adding to the potatoes just before cooking.


Cut top off of the garlic bulb/head

Brush with olive oil

Wrap in aluminum foil and put in oven to roast. After about 30-40 minutes I could really smell the garlic...yum!

Garlic after it has roasted for 60  minutes.

Squeeze garlic into a small bowl


Add olive oil

Add salt

Pepper

Thyme - I know...the picture is a bit blurry and the color is off.  I usually take a couple of pictures of each step but didn't this time.

Paprika. So....have you noticed that I'm left handed? It's really kinda of nice for a change because I have to hold the camera in my right hand in order to snap the pictures.


Mash the garlic until the mixture becomes a paste


The garlic mash....yummy. I think I may prepare this sometime when I'm roasting a chicken or turkey or it could even be used on fish.

Using potatoes that have had a very good scrubbing, cut into three or four slices.

Spread with garlic mash

Drizzle with olive oil

Sprinkle on some salt (I used kosher salt) and pepper....makes the skin taste soooo good.

Wrap each potato in aluminum foil, place on a baking sheet and bake for an hour. I had to add five minutes to mine since they were so big.


These potatoes were very good! The garlic had a nice mellow flavor due to the fact that it had been roasted, I could taste the thyme, which went well with our crab cakes since they had thyme in them too. I even ate the skin and I rarely eat the skin of a baked potato.

I'm so glad that I made the whole recipe instead of cutting it by half as I had originally planned.....I can use the leftover for home fries tomorrow. They should be awesome!

Michael said this was the best meal we've had all week. Gotta love him....he knows how to keep the cook in a good mood.
Related Posts with Thumbnails