Monday, November 30, 2009

Turkey Soup


I decided that this year I was going to prepare a Thanksgiving dinner for Michael and me. We spent Thanksgiving Day at my eldest sister's house and had a ton of food but I knew we wouldn't bring home many leftovers. We did bring home a good bit of dessert though. I wanted to have plenty of leftover turkey, mashed potatoes, gravy and dressing...but I mostly wanted the turkey carcass.

A few weeks before Thanksgiving, I was out shopping and wandered into TJ Max and found the cutest pasta....it was shaped like turkeys. I purchased a package planning to make turkey soup sometime after Thanksgiving.


How cute are these?

I prepared our dinner on Friday and after Michael had cleaned the carcass of most of the meat, I proceeded to make the stock.

Turkey Stock:

Having never made stock before, I had to do some research and between doing an internet search and the help of one of my BakeSpace friends, Vicki, went to work.

1 turkey carcass
2 onions - quartered
4 celery stalks -washed and cut into large chunks
2 carrots - scrubbed well (don't peel) and cut into large chunks
water - enough to cover the carcass, but not completely
2 bay leaves (my addition to Vicki's instructions)

Put the carcass in a large dutch oven and cover with water. Bring to boil. Then, simmer for approximately 3/4 to 1 hour. Remove turkey and vegetables. Discard vegetables. Bone turkey and refrigerate. (While boning the turkey, let the broth slowly boil to concentrate the broth.) Refrigerate broth so you can skim any fat.

I changed Vicki's instructions a little...Michael didn't have a pot big enough so I managed to get the carcass into a crockpot that he had just purchased. I added everything that Vicki instructed plus put in 2 bay leaves, turned the crockpot on high and cooked for about 5-6 hours.

Once the stock was ready, I strained it using a colander placed in a pot, covering the colander with a triple layer of cheesecloth. Once the stock has been strained discard the cheesecloth and vegetables.

Place the stock in the fridge overnight - the fat will rise to the top. The next morning, using a large spoon, skim the fat from the top of the stock.

The stock was very good, but I think next time I'll add some peppercorns and garlic cloves in addition to what I used. After further research, I found out that you should leave the peel on the onion (which I didn't) and also when using garlic. Leaving the peel on makes for a stronger flavor.

Turkey Soup:

After I skimmed the fat from the stock, I placed the pot on the stove to heat up. While the stock was heating up, I prepared the ingredients for the soup.

1 large onion - chopped
2 carrots - sliced
2 celery stalks - sliced
2 garlic cloves - chopped
1 bay leaf
1 tablespoon olive oil
2 cups leftover shredded turkey
1 package noodles (approx. 14 oz)
1 cup leftover peas
dried thyme - I didn't measure, just sprinkled some  into the pot.
salt and pepper to taste

In a skillet, I heated the oil over medium heat. Add the chopped onion and garlic and cook until soft and translucent, about 6 minutes - add to stock, then add the sliced carrots and celery, thyme,  and bring to a simmer; cook until vegetables are soft, about 10 minutes. Just before the vegetables are soft I add the pasta and cook about 7 minutes. Once the vegetables and pasta have cooked, gently stir in turkey and the peas. Simmer until heated through.

One thing I've learned over the years, while helping my mother and sister make vegetable soup, is that you can put just about any vegetable in. The recipe that mine is based on used corn and dumplings where I used peas and pasta.

If you don't eat all the soup and have to store in the fridge, the next time you go to eat it, your pasta may have soaked up a lot of the stock. If you have turkey stock on hand, (I had purchased two cartons for my gravy and dressing and hadn't used it all so added it to the soup) add that to the soup. Chicken stock can be used in place of the turkey.


The soup was delcious! Look at how cute it is too! Looks like the color disappeared from the little red turkeys....or the white turkeys gobbled them up....

Friday, November 27, 2009

Cheese Ball


I always thought there was something mysterious about making a cheese ball.....

For years a cheese ball and crackers was served at our holiday meals...my sister, Dorothea, would stop by the Marsh Supermarket and pick up two cheese balls, one that had been rolled in pecans and one that hadn't been. We all loved eating them and even looked forward to them, almost as much as the chicken and dumplings, ham, dressing, turkey, etc.,.....until one year when my sister said that she could no longer buy them. I can't remember if it was because Marsh no longer made them or whether it was when Marsh became LoBills, I don' t know for sure...never the less we had to do without our yummy cheese balls. Heaven forbid one of us look up a recipe and prepare one. Why no one did, I don't know, my mother and my sisters were good cooks so I'm surprised that they never did. This was when I was in my teens and early 20's and wasn't interested in cooking, so I certainly wasn't going to try to make one. So we just did without...

Many, many years later....on my 40th birthday to be exact, the two women I shared an office with and our student employee, surprised me with a small party. Cake, ice cream and Robin, our student employee, came in with a cheese ball and crackers. It had been a long time...as soon as I took my first bite, I was hooked again...cheese ball was back in my life. I immediately asked Robin to share her recipe and she did...she's always been my favorite student....I'm not sure if it's because she was a nice young woman or because of the cheese ball. LOL...we do share a common interest in our love of food.

Robin, if you see this, we still have to get together for lunch or dinner, it has been over a year now.

So, our next family gathering saw the return of the cheese ball to our menu (kind of like the return of the McRib at McDonalds), and I don't think it's been off of it in the last....ahem, I hate to admit that I'm so old, 12 years. It's nothing special or difficult but you can't beat the basic, green onion and dried beef ball..yeah!

2 packages cream cheese (8-oz.)
4 green onions
2 small packages dried beef or 1 large, chopped
1/2 tsp. Worcestershire sauce
1/2 tsp. soy sauce
1/4 tsp. Tabasco (pepper sauce)

Chop onions and beef. Mix together the cream cheese, the three sauces, onions and beef. Save some of the beef to put on the cheese ball.

I didn't take pictures to document each step, one, because I forgot and two, it really isn't difficult. I just get out my chef's knife cutting board and just chop the onion and dried beef into small pieces. One hint that I do have is that you don't have to, but should you decide to roll the cheese ball in some of the dried beef, I've found that it's easier to do if the cheese ball has been chilled for a few hours.


In memory of Robin Russell Grimsley who passed away unexpectedly on November 30, 2009

Monday, November 16, 2009

Red Lobsters Cheddar Biscuits


I don't go to Red Lobster often but when I do, I usually eat so many of their biscuits that I don't have room for my food and end up taking it home in a box for later. I've never really been much of a biscuit person, and when I do eat them, it's mostly at breakfast, but these are not your normal biscuits. I've wanted to attempt to make these biscuits and I've saved several recipes for them over the years, but never made them.

The November Challenge on BakeSpace was to make soup and bread. Well I'm not much of a bread baker...I make quick breads and have made yeast breads in the bread machine, but that's as far as it goes. I knew I would be making my recipes for the challenge while I was at Michael's and he doesn't eat much bread, so I didn't want to go to the trouble of attempting to make a yeast bread. After looking through my recipes, which is a daunting task in itself, I came across the recipe for Red Lobster's Cheddar Biscuits from the cookbook, Top Secret Restaurant Recipes by Todd Wilbur. Since I already knew I liked these biscuits and it looked easy enough, I chose this to make along with Texas White Chili.

Red Lobster's Cheddar Biscuits
from Top Secret Restaurant Recipes by Todd Wilbur

2 1/2 cups Bisquick baking mix
3/4 cup cold whole milk
4 tablespoons cold butter (1/2 stick)
1/4 teaspoon garlic powder
1 cup grated cheddar cheese

Bush on Top:
2 tablespoons butter -- melted
1/4 teaspoon dried parsley flakes
1/2 teaspoon garlic powder
1 pinch salt

Preheat your oven to 400 degrees.

Combine Bisquick with cold butter in a medium bowl using a pastry cutter or a large fork. You don't want to mix too thoroughly. There should be small chunks of butter in there that are about the size of peas. Add cheddar cheese, milk, and ¼ teaspoon garlic. Mix by hand until combined, but don't over mix.

Drop approximately ¼-cup portions of the dough onto an ungreased cookie sheet using an ice cream scoop.

Bake for 15 to 17 minutes or until the tops of the biscuits begin to turn light brown.

When you take the biscuits out of the oven, melt 2 tablespoons butter is a small bowl in your microwave. Stir in ½ teaspoon garlic powder and the dried parsley flakes. Use a brush to spread this garlic butter over the tops of all the biscuits. Use up all of the butter. Makes one dozen biscuits.


I know it's hard to tell, but this is after cutting the butter into the Bisquick...there are little pea size bits of butter in there.


Milk, cheese and butter have been added and lightly mixed.


Micheal doesn't have an ice cream scoop so I just used the 1/4 cup measure and my fingers to drop the biscuits.

Before buttering
Brush with butter, garlic, parsley flakes and salt....Yummy!

Michael and I both liked these. They didn't taste exactly like the Red Lobster biscuits that I've had at the restaurant, but they came very close. The difference in the taste could be that I substituted Reduced Fat Bisquick for the regular and used low-fat cheddar cheese. They are definitely worth making again!

Texas White Chili


The first time I had this chili was several years ago when my cousins, Jayne and Jill and I got together for a day of catching up....which of course, also included food. Jill provided the house, bread and drink, I baked my famous Turtle Brownies and Jayne made this delicious chili. I had never had a white chili before so was happy to have the opportunity to try it. It was so good that I asked Jayne for the recipe so that I could make it...unfortunately, I just now got around to it...a few years later. The November Challenge on BakeSpace  was soup and bread so I decided this was the perfect time to make this chili...I also made a copycat version of Red Lobster's Cheddar Biscuits.

Texas White Chili
Print Recipe

1 lb. dried Great Northern white beans -rinsed and picked over
2 lbs. boneless -- skinless chicken breasts, diced
5 T olive oil
2 medium onions -- chopped
4 large cloves garlic -- minced (I add a bit more)
1 T ground cumin
1 t dried marjoram
1 1/2 t dried oregano leaves
1 T jalapeno peppers -- chopped, with juice
1/2 t cayenne pepper
6 C chicken stock
3 C shredded white cheddar cheese (12 oz.)
Garnishes: sour cream -- tomato salsa, chopped fresh cilantro

Place beans in large pot. Add enough cold water to cover by 3 inches and soak overnight. Heat 3 T of the oil in large pot over medium high heat. Add the chicken and sauté for 5 minutes. Remove chicken with a slotted spoon to a side dish, cover and reserve. Add remaining oil to pot. Stir onions, garlic, jalapenos, cumin, marjoram, oregano and cayenne and sauté 5 minutes. Add beans and stock and bring to boil. Reduce heat and simmer for about 2 hours, or until beans are very tender. Check and stir occasionally. Add chicken and 1 C cheese and stir until cheese melts. Season to taste with salt and pepper. Serve with remaining cheese, sour cream, salsa and cilantro to sprinkle over the top.

Pre-soaked Great Northern Beans...covered with water.

After soaking overnight
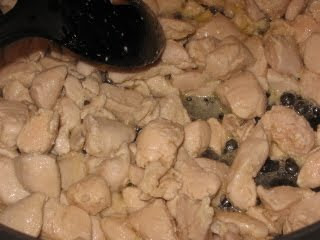
Chopped chicken....the next time I make this, I'm cutting the chicken up a little more.


 Oregano, Cumin, Cayenne and Marjoram


Brown chicken then remove from pan


Add onion, garlic, jalapeno and spices...saute 5 minutes


Add beans and stock, bring to boil then simmer for 2 hours or until beans are tender


Add chicken and 1 cup white cheddar.....cook until cheese has melted.


Season to taste and enjoy.
I already knew that I liked this chili but wanted another opinion so made this while I was visiting Michael. Once I was able to drag him away from his recliner and the TV, where he had been "coaching" his beloved Ohio State Buckeyes, he finally gave it a try.....he gave it a thumbs up. He told me he actually preferred this over our regular chili. So looks like I'll be making this again.

Monday, November 2, 2009

Pumpkin Fudge


The first time I ever heard of Pumpkin Fudge, was about five years ago. My mother had Alzheimer’s type dementia and was in a local nursing home/retirement center and I had taken her for her bi-weekly appointment at the beauty shop. The hairdresser and I were talking about all of the local fall festivals and she said that she had gone to a pumpkin festival where she had eaten pumpkin fudge, liked it and was trying to find a recipe. I don’t know why, but I found the thought of Pumpkin Fudge repulsive…I love all of the sweet things made with pumpkin but something about making it into fudge….eeeewwww!

Last year the division I work in planned to have a bake sale to raise money for our CPAC fund raiser for the Parachute Program. My oven had broken and I was searching for something I could prepare that didn’t require the use of one. For some reason, I decided to make Pumpkin Fudge….don’t even ask me why. Actually, I made some peanut butter/chocolate thing to sell but provided the fudge as part of our refreshments. I had a feeling very few, if any, of my co-workers had ever heard of pumpkin fudge, and may not want to buy it. My thinking was that if they tried it and liked it, the next time we had a bake sale, or at our Christmas auction, someone might buy it. I made the fudge and after I had poured it into the pan to cool, tasted what was left on the spoon….I couldn’t believe it…it was delicious! Needless to say, I licked the spoon clean. It was also a hit at the bake sale!

I wish I had tried making Pumpkin Fudge when I first heard about it so that my dear little mother could have tried it….she loved pumpkin and fudge….I know she would have liked this too.

The divisional bake sale is this week and this time I’m making the Pumpkin Fudge to sell.

1 1/2 cups granulated sugar
2/3 cup evaporated milk
1/2 cup mashed pumpkin (canned)
2 tablespoons butter
1/4 teaspoon salt
1 1/2 teaspoons pumpkin pie spice
1 package vanilla flavored baking chips -- (12 ounce)
2 cups miniature marshmallows
1/3 cup chopped nuts (optional)
1 1/4 teaspoons vanilla extract

Using butter or margarine, lightly grease the sides and bottom of a medium saucepan. Place the sugar, evaporated milk, pumpkin, butter, salt, and pumpkin pie spice in the saucepan.
Stirring constantly over medium heat, bring the mixture to a boil and boil for 12 minutes.
Remove from the heat and stir in the baking chips and marshmallows until melted.
Stir in the nuts and vanilla extract.
Pour into an 8-inch square pan that has been lined with foil and greased.
Chill mixture until set.
Cut into small squares to serve.
Cover and store in refrigerator.

Sugar, Pumpkin, Milk, Butter, Pumpkin Pie Spice and Salt

Boil....I always use a wooden spoon whenever making candy. I read once that you should never use silver or flatware.

Add white baking chips and marshmallows...you really need to work fast at this point. You don't want the fudge to get hard before getting it to pan.

Add Vanilla


Pour into prepared pan and chill until set. Cut and store in fridge.

This is a very easy recipe...you don't have to use a thermometer or have to get it to the soft or hard ball (can't remember which it is) stage. All of my fudge receipes use either marshmallows or marshmallow cream.

Sunday, November 1, 2009

Pasta with Pumpkin and Sausage


This is a recipe I discovered while looking for something to prepare for the BakeSpace Challenge for October. We were supposed to prepare something made from local produce that is in season for October. Being from SW Ohio, finding a variety of local produce this time of year is a challenge in itself…I knew we had apples and pumpkins but wasn’t sure what else. Danielle (Cooking for My Piece of Mind and another BakeSpace regular) found a link to NRDC....Eat Local which contained lists of seasonal produce for different parts of the country. Well, unfortunately, there isn’t a lot to choose from this time of the year….in my opinion. I’m not a fan of cruciferous vegetables (broccoli, cauliflower and cabbage), and that is what is available, along with peppers (I like them a little but not enough to use as a main ingredient), along with the before mentioned apples and pumpkin.

I decided to try to find something using apples and/or pumpkin, but didn’t want to use them in a way that I normally do….cookies, pie, cake, candy, muffins, etc. I wanted to try something different….savory instead of sweet. While searching for a recipe, I received the Food Network Newsletter in my email and it contained links to pumpkin recipes. I found several pumpkin pasta recipes and decided on this Rachel Ray recipe.

Pasta with Pumpkin and Sausage
Print Recipe
1 tablespoon extra-virgin olive oil -- plus 1 tablespoon
1 pound bulk sweet Italian sausage
4 cloves garlic -- cracked and chopped
1 medium onion -- finely chopped
1 bay leaf -- fresh or dried
4 sprigs sage leaves -- cut into chiffonade, about 2 tablespoons (4 to 6)
1 cup dry white wine
1 cup chicken stock
1 cup pumpkin
1/2 cup heavy cream
1/8 teaspoon ground cinnamon
1/2 teaspoon ground nutmeg -- ground or freshly grated
Coarse salt and black pepper
1 pound penne -- cooked to al dente
Romano or Parmigiano -- for grating

Heat a large, deep nonstick skillet over medium high heat. Add 1 tablespoon of olive oil to the pan and brown the sausage in it. Transfer sausage to paper towel lined plate. Drain fat from skillet and return pan to the stove. Add the remaining tablespoon oil, and then the garlic and onion. Sauté 3 to 5 minutes until the onions are tender.

Add bay leaf, sage, and wine to the pan. Reduce wine by half, about 2 minutes. Add stock and pumpkin and stir to combine, stirring sauce until it comes to a bubble. Return sausage to pan, reduce heat, and stir in cream. Season the sauce with the cinnamon and nutmeg, and salt and pepper, to taste. Simmer mixture 5 to 10 minutes to thicken sauce.

Return drained pasta to the pot you cooked it in. Remove the bay leaf from sauce and pour the sausage pumpkin sauce over pasta. Combine sauce and pasta and toss over low heat for 1 minute. Garnish the pasta with lots of shaved cheese and sage leaves.


Brown sausage

Onions and garlic

Bay Leaf, Sage and Wine


Add Pumpkin and Broth


Add Sausage, seasonings and cream


I served this with a whole grain pasta...I felt the pumpkin would go well with it.

I have to admit that I was a little concerned about this recipe. Never having pumpkin as a savory dish, I wasn't sure I would even like it...but I did. Michael wasn't quite as impressed...kept referring to it as hamburger helper....hmmmm. I think he really would have preferred a red sauce instead.

I will make this again, but maybe not when Michael is around.
Related Posts with Thumbnails