Tuesday, January 26, 2010

Garlic-Herb Mac and Cheese


Several years ago when I used to do a lot of baking, I used to get the King Arthur Flour Catalog and also frequented their web site and baking forum (Baking Circle). At the time, I purchased many fine quality products from them as well…they are an excellent company. I now receive their newsletter which always contains at least one recipe, along with a link to their interesting and informative blog, Baker’s Banter.

A few weeks ago this recipe for Garlic-Herb Mac and Cheese was in the newsletter. I thought it looked good, so copied it for later use. Tuesday, I was planning to reheat some leftovers for Michael and me to have for dinner, but wanted something new and decided to try this recipe. I had already purchased most of the ingredients, with the exception of the special items that the King Arthur Flour Company carries, and made substitutions or omitted those….I also doubled the recipe.


This recipe was written to fit a 2 quart casserole dish.

Macaroni
8 ounces uncooked pasta (elbows (about 2 cups) trumpets, rigatoni, ditalini, cavatappi, ziti... anything tubular)
1/4 cup Signature Secrets Culinary Thickener or King Arthur Unbleached All-Purpose Flour
2 3/4 cups milk
1/2 cup Vermont cheese powder
2 cups shredded cheddar cheese
1/2 teaspoon ground black pepper
1/2 teaspoon ground mustard powder, optional
1/4 teaspoon salt, to taste (1/4 to 1/2)

Topping
4 tablespoons butter
2 teaspoons garlic oil, optional
2 teaspoons Pizza Seasoning or rosemary and thyme
1 1/2 cups Japanese panko (coarse bread crumbs)

1.  Preheat the oven to 350°F. Grease four 1 1/2 to 2-cup ramekins, or one 2-quart baking dish.
2.  Cook the pasta in boiling salted water until al dente (slightly firmer than you would normally eat it). Drain and rinse with cool water. Set aside.
3.  In a large saucepan set over medium heat, whisk together the Signature Secrets, or flour, milk, and cheese powder. Bring to a boil.
4.  Remove from the heat and stir in the cheese and seasonings. Stir occasionally, until cheese is completely melted.
5.  Stir the pasta into the cheese sauce. Spoon it into the baking dish(es).
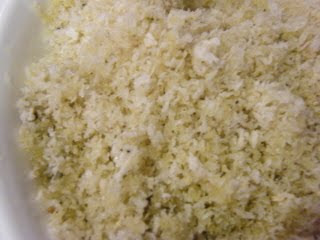
6.  Melt the butter and garlic oil together, then stir in the pizza seasoning and panko bread crumbs. Sprinkle a thick layer over the pasta and cheese.
7.  Bake the casserole for 25 to 35 minutes, until bubbly and browned. Remove from the oven, and serve hot.
8.  5 1/2 cups, about 4 servings.

I made a few changes to the above recipe:
I doubled the recipe for a 9x13 pan
I used all-purpose flour that I had on hand, although, King Arthur Flour can be purchased at many supermarkets.
I couldn't find any Vermont Cheese Powder, or cheese powder of any kind, anywhere and didn't have time to order it from the King Arthur Flour Co. so I simply omitted it.


Cook pasta, drain, rinse and set aside.


Whisk together flour, milk and, if you have it, cheese powder and bring to a boil.


Remove from heat and stir in cheese. I used a sharp cheddar by Cabbot.

Add pepper


Add mustard.


Stir in pasta.


Spoon mixture into prepared dish.


Melt butter and oil together, stir in pizza seasoning. Fortunately, there is a Penzeys Spice store not far from Michael's apartment and I purchased the Pizza Seasoning from them.


Mix in panko bread crumbs.

Sprinkle crumb mixture over pasta and cheese.

Bake in a 350 degree oven.


This smelled so good while baking that even though I didn’t feel hungry before I put it in the oven, I was by the time I removed it. It was very good….the bread crumb topping was a little crunchy and had a garlic and spicy flavor. The only thing I was disappointed in is that it didn’t taste as “cheesy” as I would have liked…maybe the addition of the cheese powder would have made the difference, or possibly a little more cheese could be used. We liked it enough that I will definitely make it again, but will be ordering the Vermont Cheese Powder before I do.

Printable Link for Garlic-Herb Mac and Cheese

*** Update*** since my original posting, I've made this recipe using the Vermont Cheese Powder and the cheese powder made all the difference.....it was delcious!  At Michael's request, I've made this several times since then.

Sunday, January 24, 2010

Grilled Meatloaf Sandwich


My eldest brother got me hooked on meatloaf sandwiches when I was little. It took him quite some time to convince me that they were good and I was reluctant to try one….but I eventually caved in. He took two slices of bread, placed a cold slice of meatloaf on one, covered the meatloaf with ketchup and then topped it off with the second slice of bread. To my surprise, it was very good! This has been my preferred way of eating leftover meatloaf ever since. That is, until recently…….

About a year ago, a friend and I made our first trip to Patterson’s CafĂ©, where I ate my first grilled meatloaf sandwich. Patterson’s Cafe, located in Oxford, OH, is one of those restaurants that serves only breakfast and lunch and then closes at 2:00 or 3:00 PM. Since, they serve breakfast all day, it was a difficult choice for me...I couldn’t decide whether to order breakfast or lunch. I love breakfast and whenever I’m at a restaurant that serves it all day, I usually choose that, but when I saw the grilled meatloaf sandwich on the menu, I decided to give it a try....and I'm glad I did. It's the best meatloaf sandwich that I've ever had! It’s served with a dill pickle spear (I love dill pickles and can never find any that taste as good as the ones that are served in restaurants), and a bag of potato chips….and is more than I can eat. By the way, Patterson's Cafe does make an awesome breakfast too.

It’s been a while since I’ve eaten this sandwich, so I may not have the exact ingredients, but I know it’s close. They use Texas Toast size bread....and I think it may be sourdough. I used a good white bread....in other words, no Wonder or Butternut....I now wish I had used whole wheat. I'm not sure what type of cheese they put on their sandwich, but I think it's Monterey Jack. ...so that's what I used.

Bread
Meatloaf slice(s) - I used Mom's Meatloaf recipe
Onion, sliced or chopped and sauted
Monterey Jack Cheese, sliced
Butter


Saute onion in butter until soft.


Butter one side of each slice of bread....just like when making grilled cheese.


Place cheese slices on unbuttered side of bread.


Place a slice of meatloaf on cheese.


Spread onions over the meatloaf.


Top with more cheese.


 Place second slice of bread on top....buttered side facing up.


 Grill....If you have a panini press/maker you may want to use it....I actually considered using the Foreman grill. I was afraid, since the sandwich was so thick, that the bread would burn before the cheese melted, but it worked out fine. It was a little difficult to turn over.


This was as good as the grilled meatloaf sandwich that I order at Patterson's Cafe....even Michael liked it and he's not much of a sandwich eater. He liked it so much that even though he put ketchup on his plate to dip the sandwich in, he didn't use it. I feel the same way, I omit the ketchup too...and I always have ketchup with meatloaf.

Saturday, January 23, 2010

Mom's Meatloaf - Take Two


Meatloaf is one of my favorite foods…to me it says comfort as much, if not more, than pot roast. I don’t believe I’ve ever met a meatloaf that I didn’t like, some I’ve liked better than others, but still think my mom’s was the best.

Mom didn’t have a recipe for her meatloaf, she may have at one time but by the time I remember watching and helping her make this, she didn’t use one. So I took what I could remember, along with some recipes that I found on the internet and came up with one that is very close to hers. I still don’t think it tastes quite like hers, but I’m in the ball park.

One of my first blog posts was about Mom’s meatloaf recipe…back then all I did was post the recipe along with a picture (my first didn’t even have a picture). Below is the recipe along with a few revisions.

Print Recipe
1 pound lean ground beef
1 pound ground pork sausage
½  cup onion, chopped
2 eggs
1/2 cup saltine crackers (approx. 1/2 sleeve) crushed
1 can tomato soup

Preheat oven to 350 degrees F
Sauté onion until soft
Combine beef, pork sausage, onion, eggs, tomato soup and crackers and mix well
Place in 9x5 loaf pan or a baking pan and shape into a loaf
Bake for 45 minutes - 1 1/2 hours. Internal temperature should reach 160 degrees F.
Remove from oven and let rest for at least 15 minutes before slicing


Mom didn't measure out the crackers....she just used a package or two from the box. Back then, the crackers didn't come in a sleeve like they do now, so I'm not really sure how much she used. A food processor or rolling pin can be used to crush the crackers, but since I was cooking at Michael's I had neither, so used a bottle of garlic oil.


I place butter in a frying pan and then saute the onions ....Mom never did this, she just chopped the onions and placed them in the meatloaf mixture. This may be one of the reasons our meatloaf doesn't taste exactly the same.


Place all the ingredients in a large bowl and mix well. This is where my mom let me help…mixing the meatloaf. I had to put my hands in the bowl and squish it through my fingers. I didn't care for it then and I don't like it now. I usually use my Kitchen Aid stand mixer for this process…use the dough hook, set the mixer on 1 and it does a fine job. Since I was at Michael’s, I was forced to use my hands….yuck! Did I already tell you that I hate this part?


I normally use a large loaf pan but since I had made an unplanned trip to Michael's, I didn't pack my loaf pan, so just used a 9x13 pan and tried to shape it into a loaf. It is kind of loafish...... Now that this is done, I can wash my hands....yeah!


Ok....I do like ketchup....mom used it to top her meatloaf and so do I....I also spread some on my serving when getting ready to eat.


Michael couldn't wait to cut into the meatloaf.


Normally Michael doesn't get it when I take pictures of my food, but this time he actually brought his plate back into the kitchen and asked me to take a photo. He said, "Here take a picture of my plate so they can see it." It does look better than mine...especially since he put more cheese on the garlic and cheddar mashed potatoes and his ketchup was already on his plate. By the way, this was his first serving...he went back for seconds.

Sunday, January 10, 2010

Banana Chocolate Chip Muffins


I really don’t have a whole lot to say about these muffins….aren’t you lucky. Except that this may have been one of the first recipes that I found on the internet….probably about 10-15 years ago. I used to go to the old news groups; rec. food.cooking, rec.food.baking, etc. These groups are still out there, at least they were about a year ago, but they don’t have as much activity as they used to, with the exception of all of the spam that is now posted.

I'm reminded of my mother, whenever I make these muffins…she loved them.

Print Recipe

1 cup white sugar
½ cup vegetable oil
2 eggs
3 medium bananas, mashed
3 tablespoons sour cream
1 teaspoon baking soda
2 cups flour
½ cup chocolate chips

Preheat oven to 400°

Beat sugar and oil, add eggs, and then bananas; mix thoroughly. Dissolve soda in sour cream, and add to banana mixture. Sift in flour and stir gently until just blended. Add chocolate chips.

Add mixture to a greased muffin tin; fill each cup to the top. Bake for 20 to 25 minutes.

Makes 12 muffins


Michael took one look at these bananas and asked if I wanted him to run to the store and buy new....couldn't believe I wouldn't just throw these out.  I told him that these are the best for banana bread and muffins. Why does he question what I do in the kitchen?


Mash bananas....I sometimes use a potato masher or imersion blender.


Whip eggs a little.

Mix sugar, oil and eggs

Add bananas and then sour cream mixture. Once again, I got carried away and didn't get a picture of the sour cream baking soda mixture.

Sift in flour and add chocolate chips.

 Fill muffin tin. Since I use dark pans, I always lower the oven temperature by 25 degrees....so I baked the muffins at 375.


 These were a little overbaked. I think Michael's oven bakes at a higher temperature than mine and I should have taken these out of the oven a few minutes earlier.


Even though the muffins were baked a little too long, they were still nice and moist. Michael was so anxious for these to be ready that he didn't even give them a chance to cool off before he grabbed one.

Tuesday, January 5, 2010

Turtle Brownies


I’m a sucker for those small cookbooks that are on display at the checkout stand, especially if they have anything to do with baking…. and I have a ton of them stashed away at home. One day while in line at Kroger, I discovered a Baker’s Chocolate cookbook and thumbed through it while waiting my turn to be checked out. There was no way I was going to be able to leave this little treasure of a book behind…hey, it was about baking and chocolate, and when I saw a recipe for the Turtle Brownies (I think they may have called them Caramel Brownies), I knew it had to be mine. I love Turtle candy…caramel and chocolate are two of my favorite things to eat, the caramel and chocolate combo should be its own food group, and when combined…heavenly!

The first time I made these brownies was for work, needless to say, not only was I hooked, but so was everyone else in my office. Even a young man, who detested pecans, overlooked that fact and still would eat several. This has become a recipe that I’m known for and am requested to make quite often.

4 squares unsweetened chocolate (4 oz.)
3/4 cup butter (1-1/2 sticks)
2 cups sugar
3 eggs
1 teaspoon vanilla
1 cup all-purpose flour
1 cup semi-sweet chocolate chips
1 1/2 cups chopped nuts
1 package caramels - 50 caramels if bought in bulk (14 ounces)
1/3 cup evaporated milk

Heat oven to 350 degrees.

Microwave chocolate and butter in a large microwavable bowl on High 2 minutes or until butter is melted. Stir until chocolate is completely melted.

Stir sugar into melted chocolate mixture. Mix in eggs and vanilla until well blended. Stir in flour. Remove 1 cup of batter; set aside. Spread remaining batter in greased 13x9 inch pan. Sprinkle with chips and 1 cup of nuts.

Microwave caramels and milk in same bowl on High 4 minutes, stirring after 2 minutes. Stir until caramels are completely melted and smooth. Spoon over chips and nuts, spreading to edges of pan. Gently spread reserved batter over caramel mixture. Sprinkle with remaining ½ cup nuts.

Bake for 40 minutes or until toothpick inserted into center comes out with fudgy crumbs.

Do not over bake. Cool in pan; cut into squares

Makes about 24 brownies

To prepare the baking dish, take a large piece of aluminum foil (large enough so that it hangs over, at least, two sides of the dish. Spray foil with cooking spray.

Once brownies have cooled off enough, so that you can remove them from the pan without cracking, pull up on the opposite ends of the aluminum foil and lift the brownies out of the pan.

Place on a cutting board and put in the refrigerator. When the brownies are cold, and the caramel has hardened, remove the aluminum foil from the brownies (this may be a little difficult, if any of the caramel is stuck to the foil), place brownies back on the cutting board and cut into 24 pieces. It took me many years, and ruined brownies, to discover this…you get a nicer cut when the brownies are cold and the caramel is hard.


Melt butter and chocolate in microwave - until butter is melted.

Stir until chocolate is melted


Mix in sugar

Mix in eggs and vanilla

Mix in flour

Remove one cup of batter and set aside

Layer batter in bottom of prepared baking dish

Add layer of one cup chocolate chips. The chocolate hasn't bloomed, this just isn't a very good picture.

Add one cup of pecans

Put caramel and milk in same bowl and melt

Pour melted caramel over brownie, chocolate chips and nuts

Spread remaing cup of batter over melted caramel and top with remaing 1/2 cup of pecans.

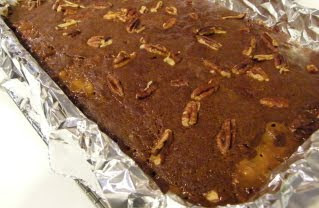
Brownies have baked, been remove from baking dish and ready to go into fridge to cool. This hardens the caramel and makes it easier to cut.

Carefully remove the aluminum foil (this may be a little difficult if any caramel has stuck to it) and cut.  I sometimes find it easier to cut if I turn the brownie over. Let brownies come to room temperature before eating.


These brownies are fudgy, rich and decadent ….almost as much a candy as a brownie. It’s as if they have a personality disorder…”I’m a brownie, no I’m candy…I’m a brownie, no I’m candy.” I don’t care what it is, just give me one along with a glass of ice cold milk!

Printable Link for Turtle Brownies

Related Posts with Thumbnails